When setting up to record a band live, I sometimes get such questions/observations as: “So, you just make one recording, pan things left and right, and cut them into individual songs?” Or, “Why does it take you that long to mix the music. Isn’t it just a matter of panning the instruments and voices, and maybe adding a little reverb to make it sound cool?”
From a layperson’s perspective, this may be all that seems to be required. But let me clarify what live mixing typically involves. Then I’ll mention a few things that typically go “above and beyond” and involve more than a typical live mix.
1. Cleaning and arranging the tracks. First of all, for each song, the tracks need to be cleaned and arranged. Usually, this means: 1) that any time a miked instrument or voice is idle, the track is muted, to minimize bleeding into other tracks; 2) that the beginning and end of each track has to be identified, and faders in/out have to be applied; 3) any noise (bumped mics, strange screams from the audience, etc.) is minimized; 4. that tracks for both lead and background vocals are created for each singer.
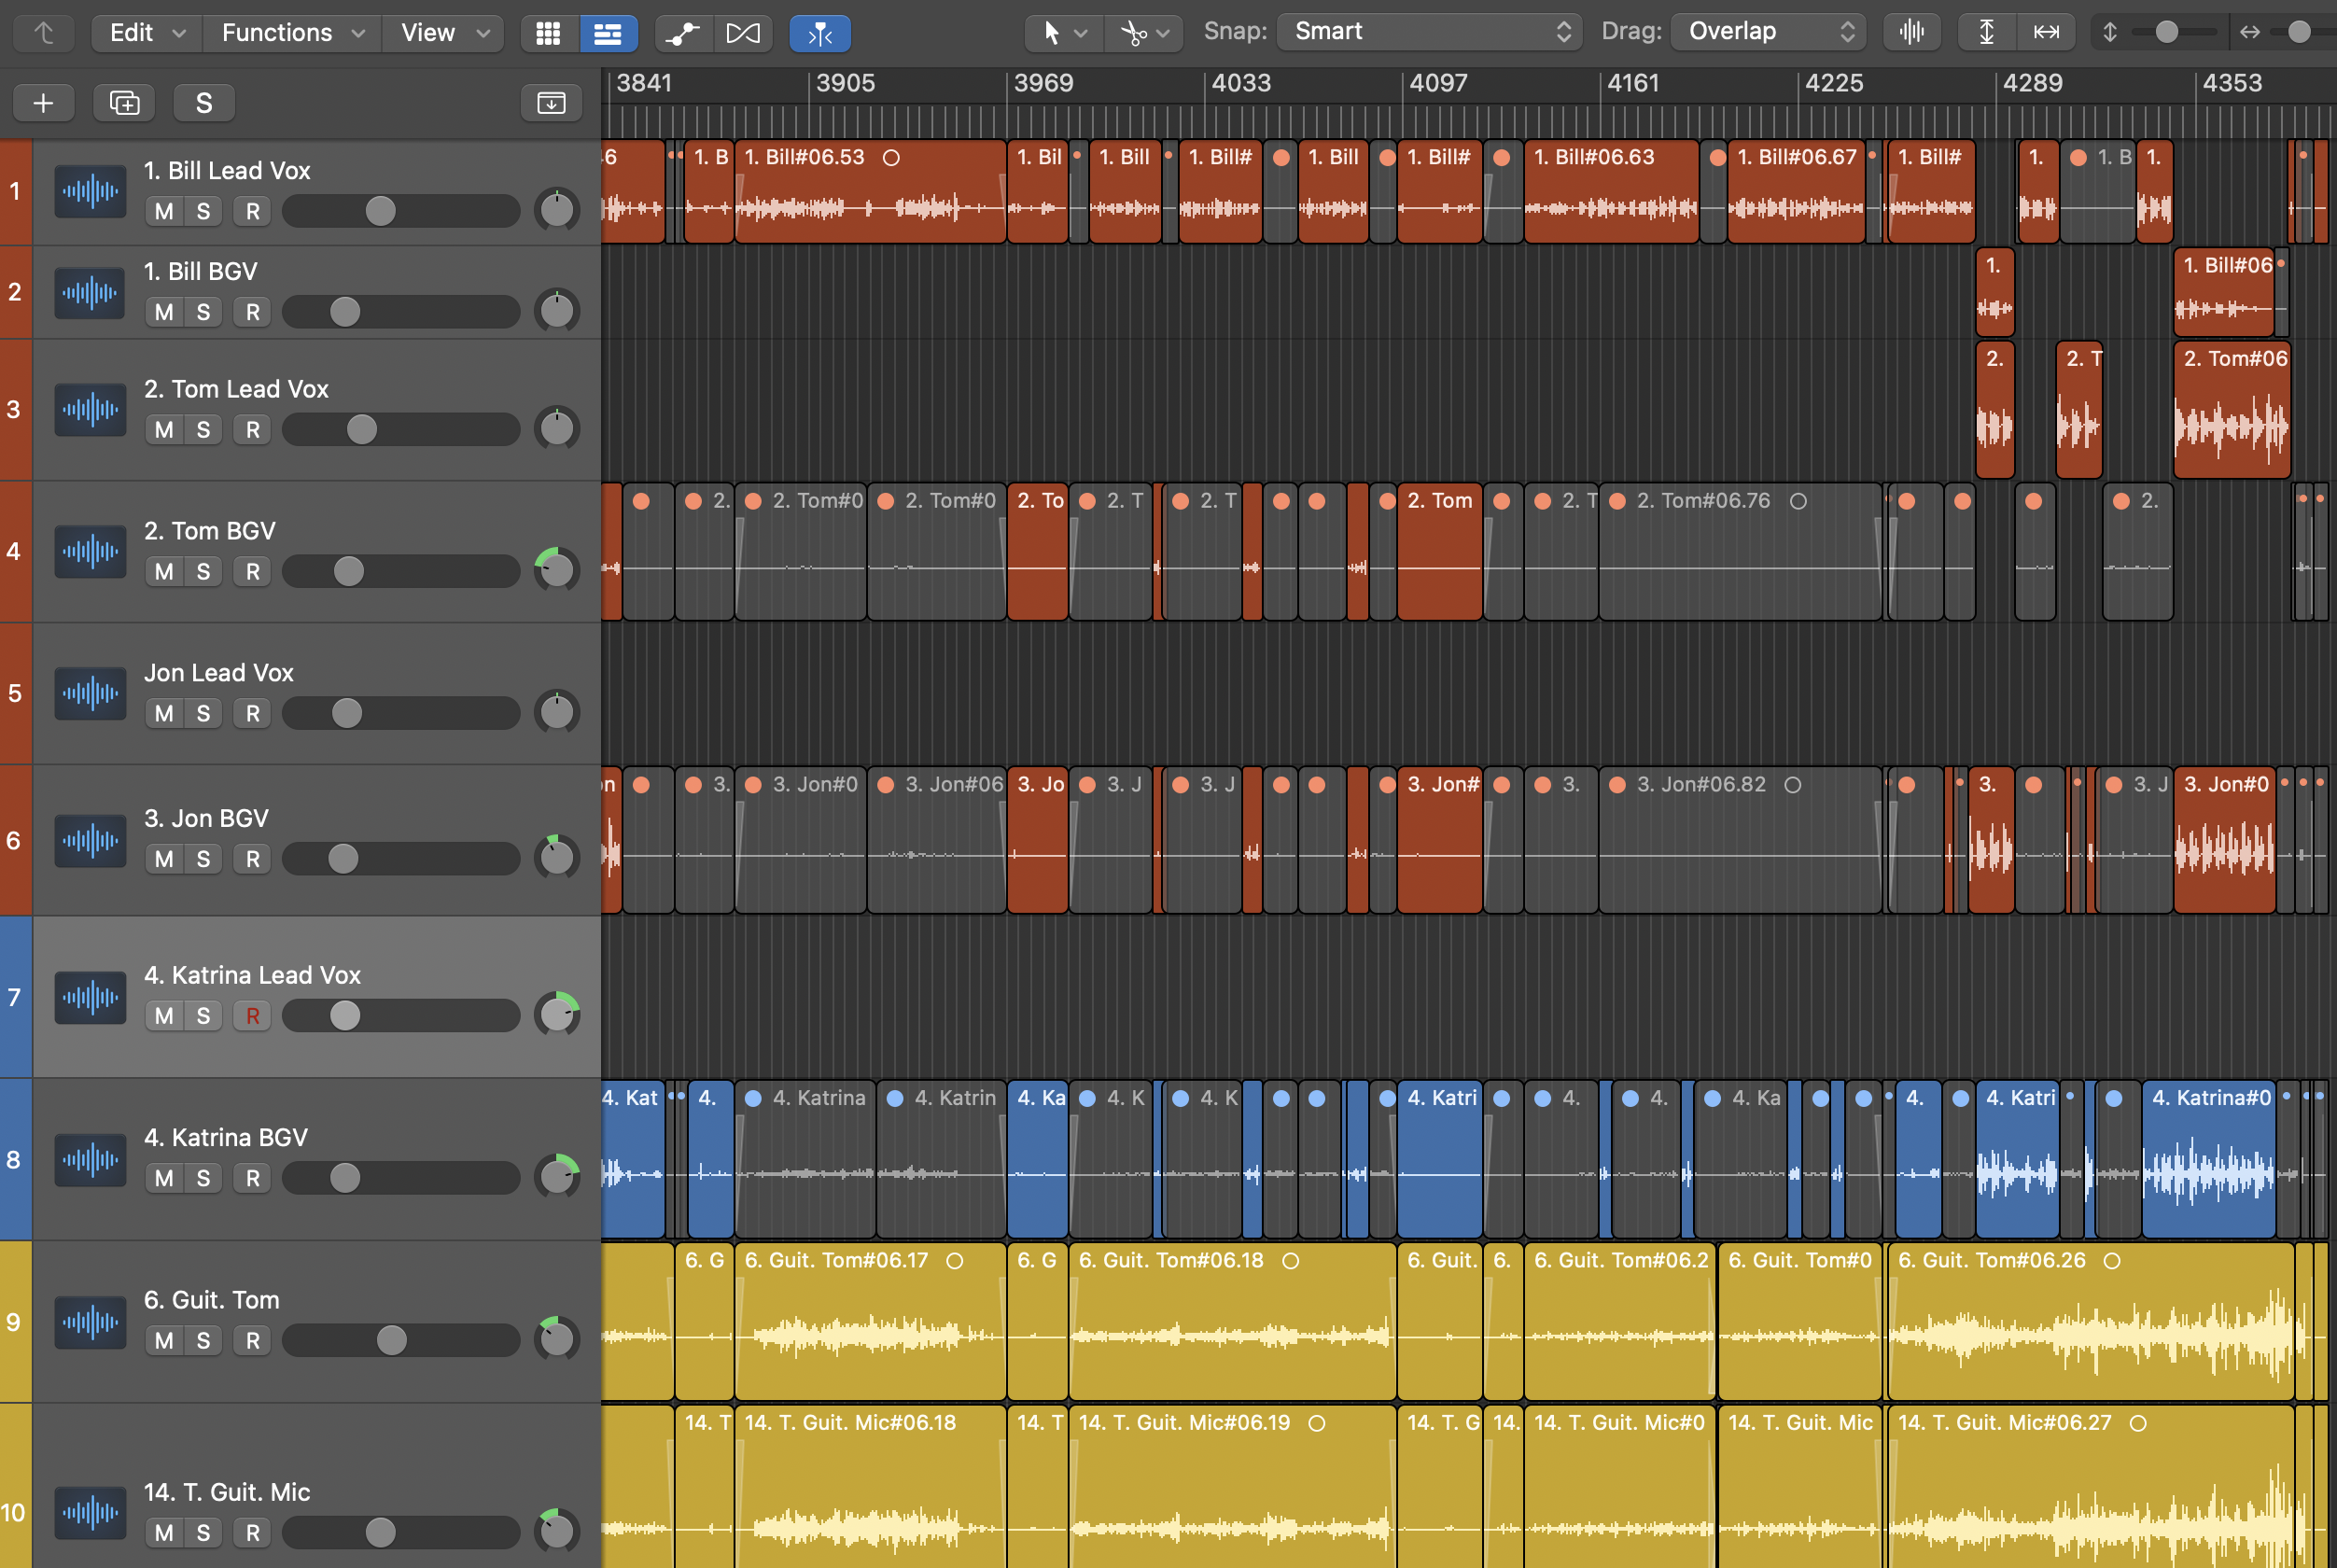
In the photo above the grey areas are muted. The shaded areas at the beginning and end of sections indicate the fade-ins and fade-outs of each song. Notice that both lead and background vocal tracks are present for each singer who does both.
2. Aligning tracks and addressing phase issues. It is important, especially if the drums and back line instruments are a long way from front of stage microphones to nudge those track “forward” ever so slightly to keep stage “delay” under control. This can be done by ear, and by visually aligning the transients between back line tracks and front of stage microphones. It is also crucial to address any out of phase issues between individual drums (kick and snare, snare and hi hat, overheads and snare, etc.) Usually, reversing the polarity of one or two drums will solve these issues.

In the photo above the different directions that these transients are moving indicate a possible phase issue, or the need to nudge a track slightly in one direction or another to match correctly.
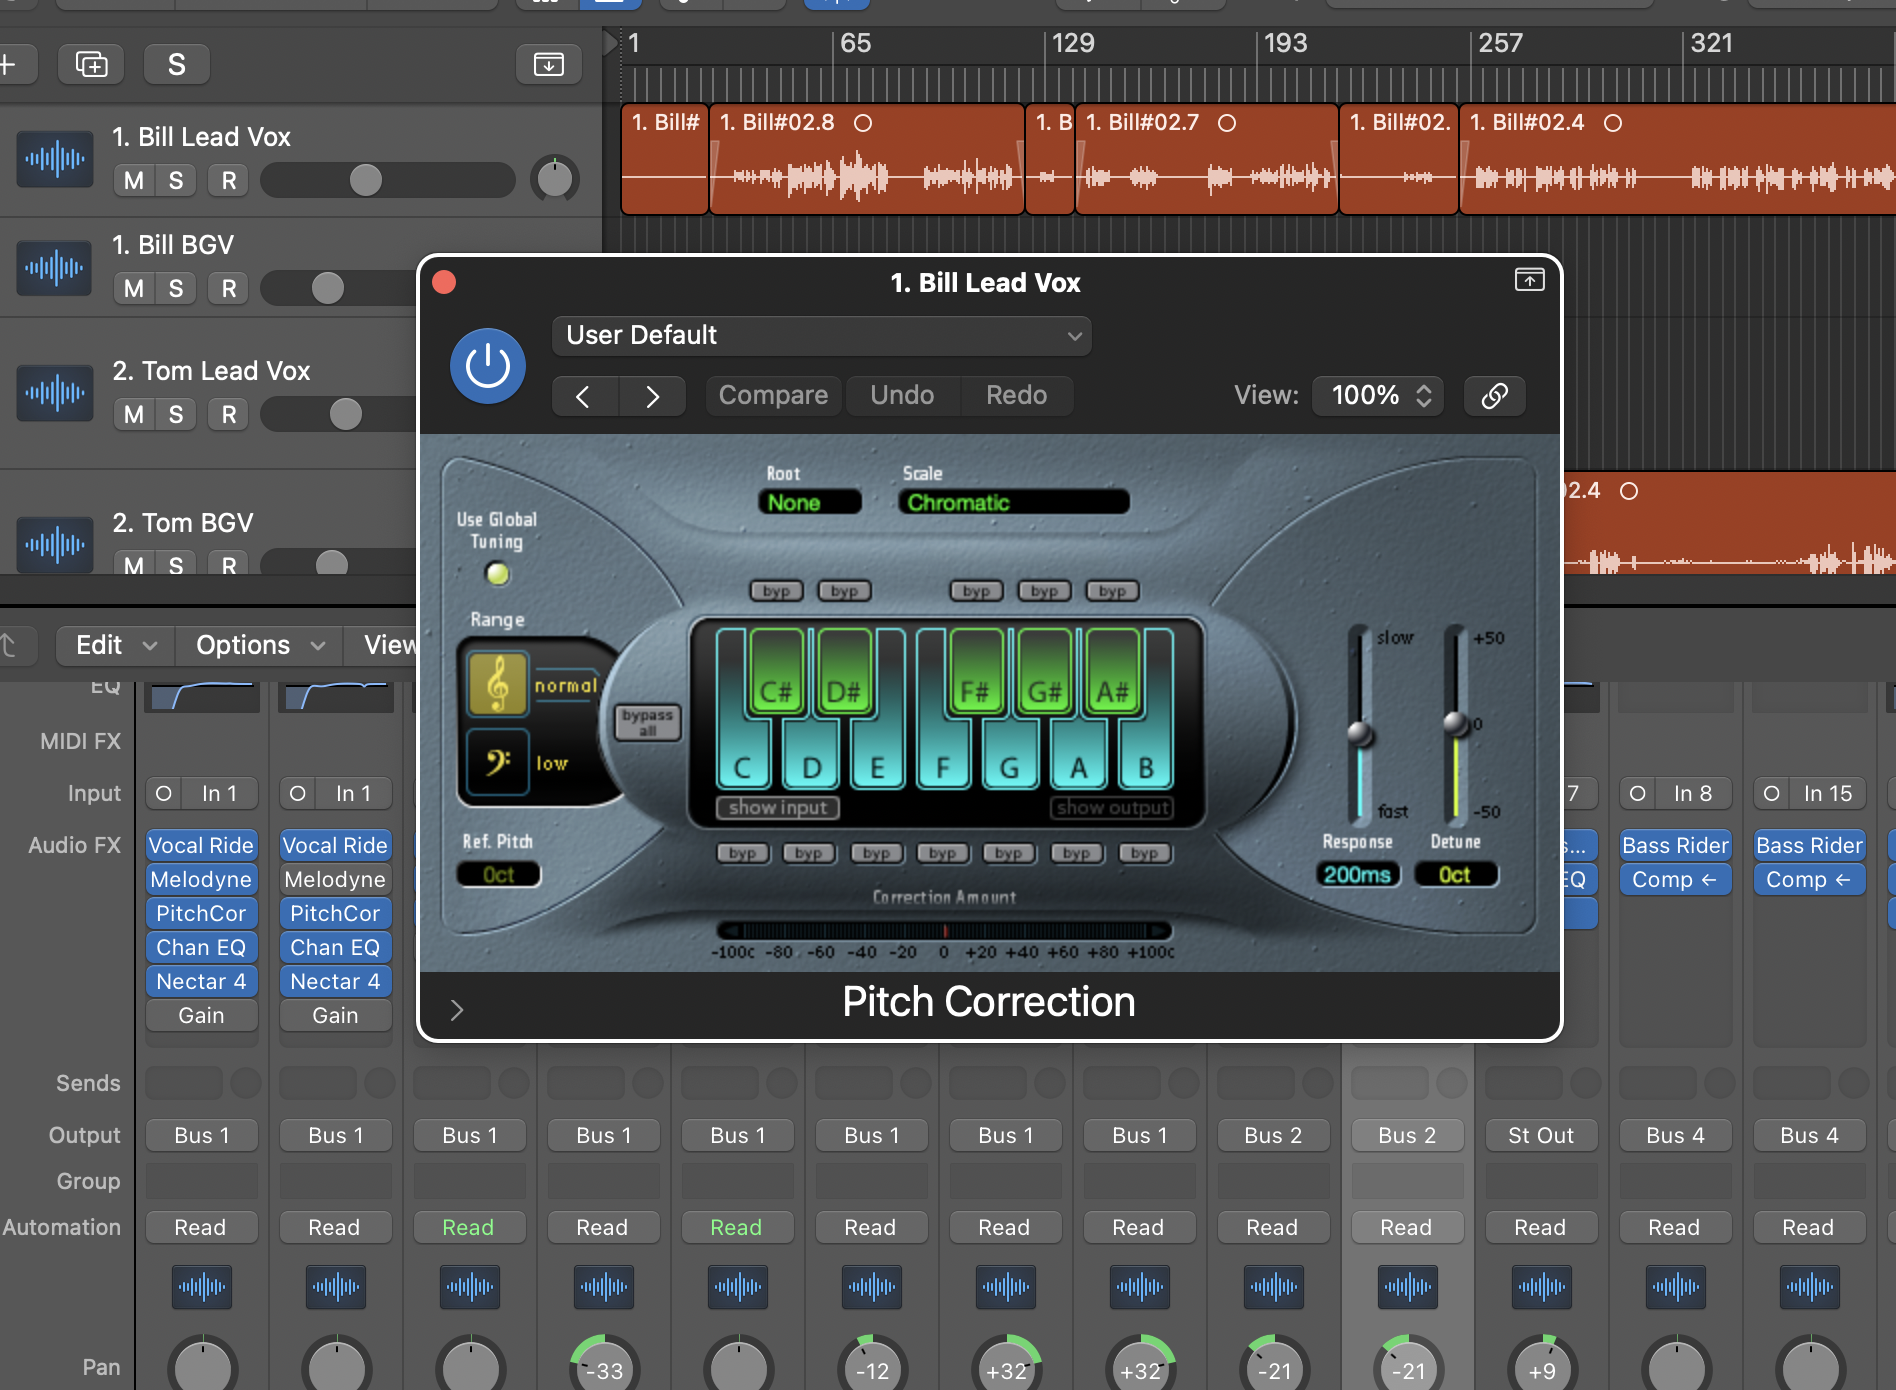
3. Getting each voice in shape: This involves adding eq, rolling off the low end (below 350 hz is typical), adding compression as needed, and sometimes a small amount of reverb or delay. This also involves some general panning of voices, though this will vary from song to song depending on who is singing lead. I also use some general pitch correction as needed. And on occasion I will pitch correct a few individual notes.

In the photograph above you can see that I’m rolling off the low end, adding a “vocal rider” (from Waves audio) to bring up low volume sections and tame high volume sections, and compression and imaging using Nectar 4.
The 2 photographs below show a general chromatic pitch correction tool (from Logic) using “chromatic” setting and a moderately fast response, and individual pitch correction using Melodyne.

4. Setting up vocal busses: I use a lead vocal buss and a BGV (background vocal) buss. When a singer is singing lead, I buss them through a Lead Singer buss that has a different, more “upfront” and present sound. Those singing background are bussed through buss that is set up for background vocals, with a little vocal doubling, slightly deeper reverb to set them back in the mix a little, etc.

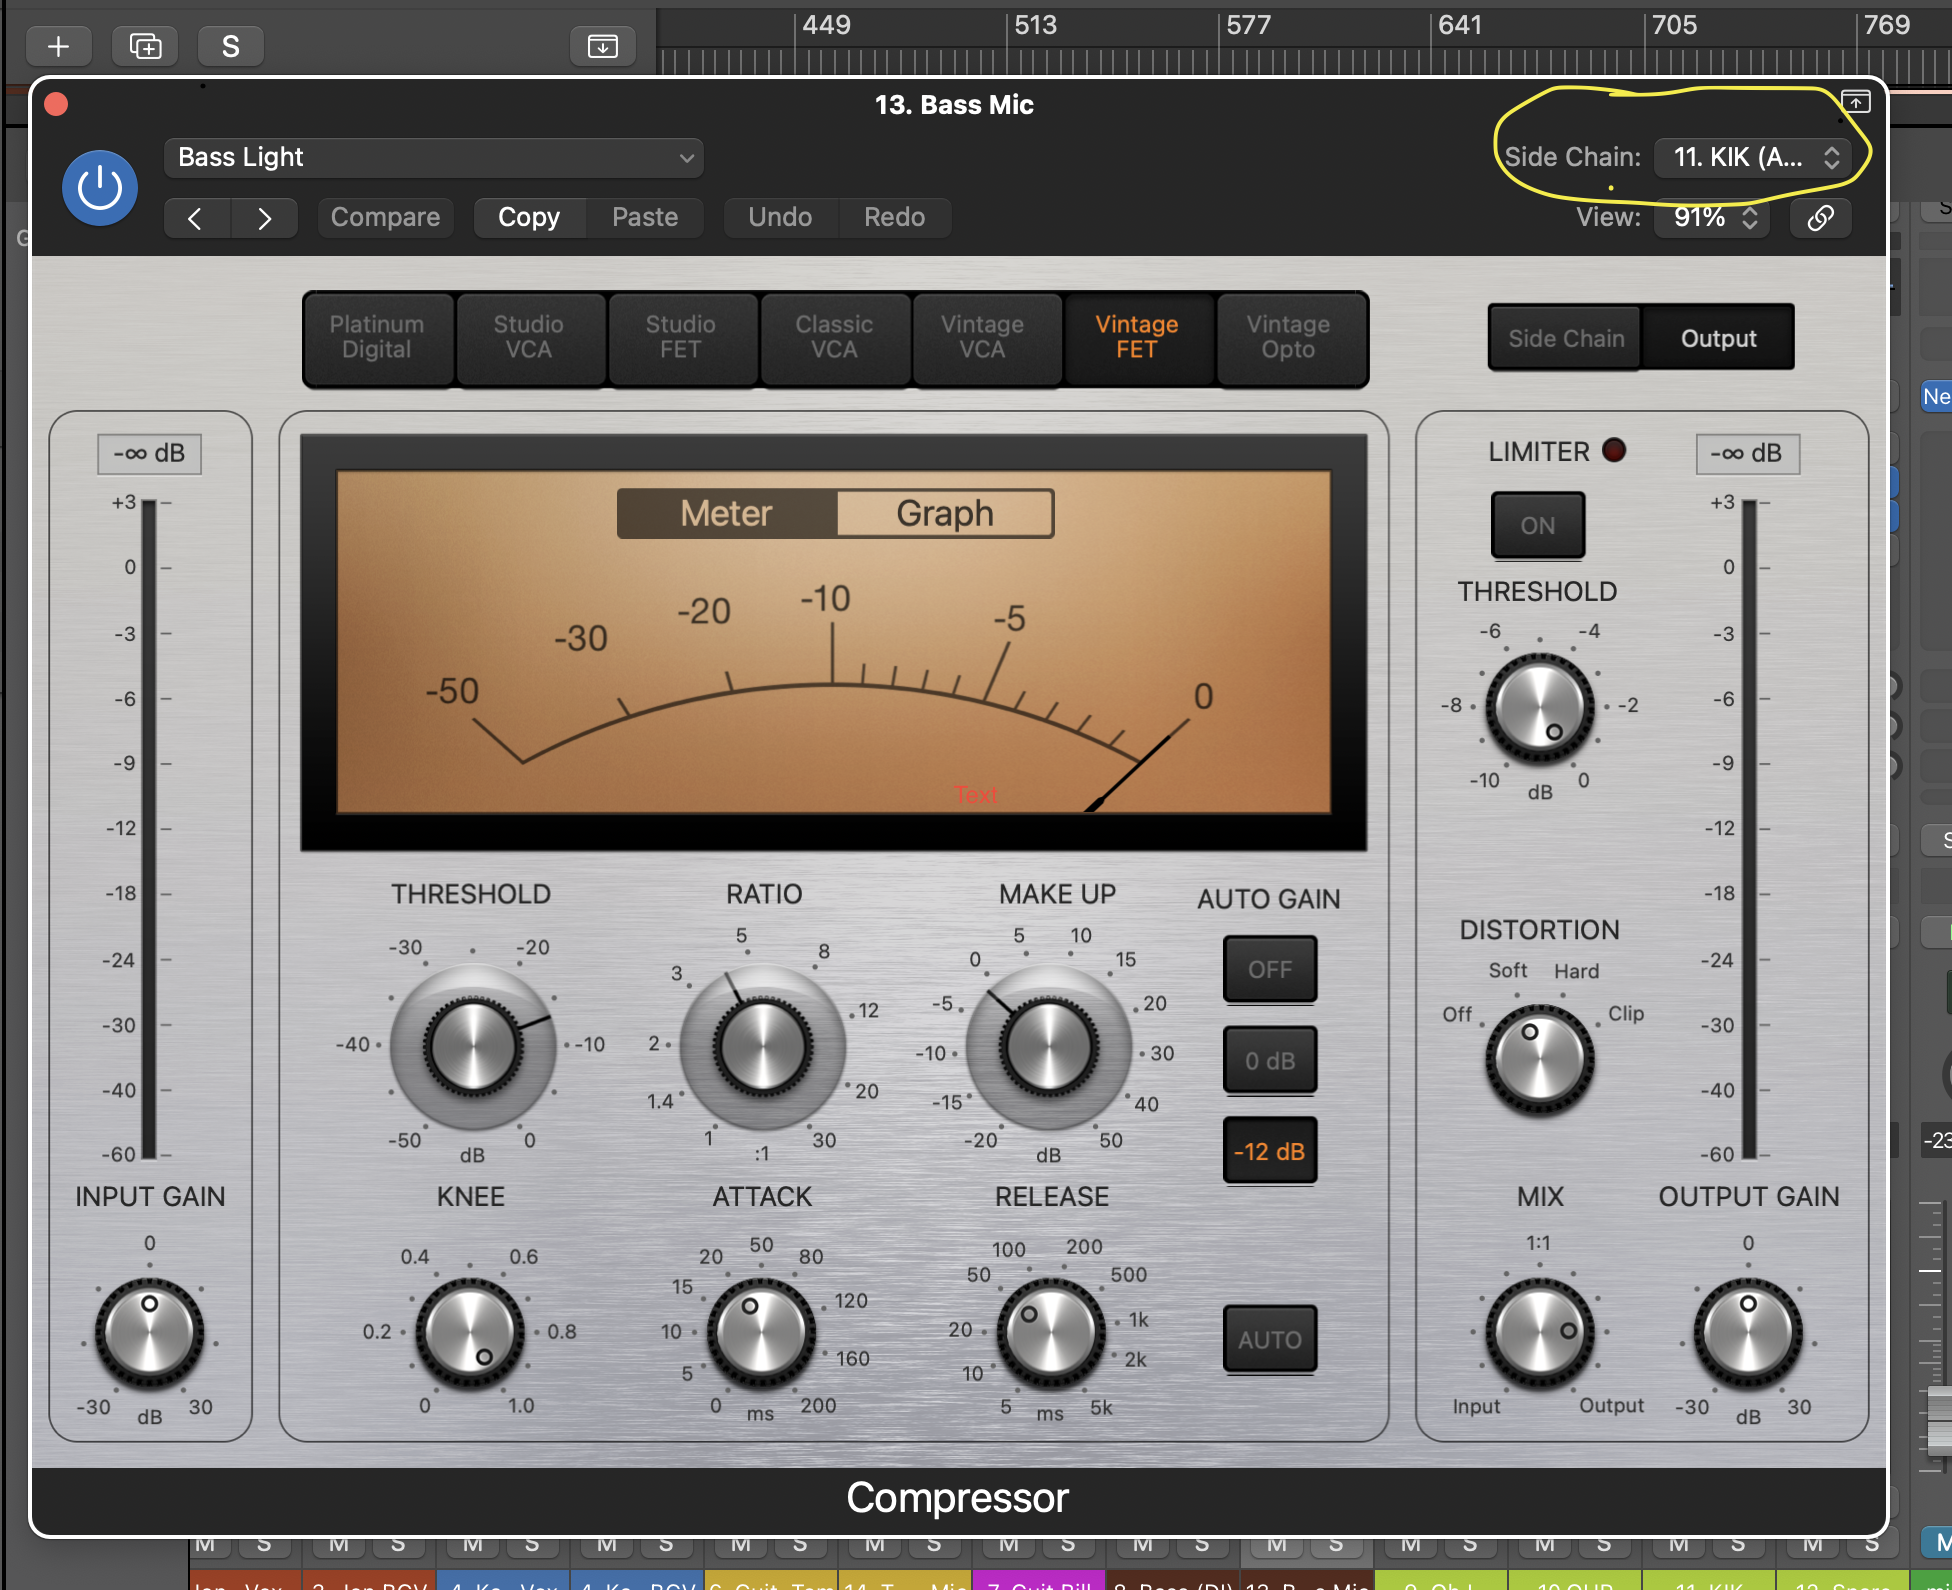
5. Getting drums in shape: This involves adding eq and compression to each drum or drum mic as needed. It also involves “compression-locking” the kick drum to the bass track using a side chain, so that the bass and kick feel “locked” together in the mix. Depending on the quality of drums and the consistency of the drummer, this can take quite a long time. In some instances using “drum replacement” samples will be necessary.
In the photo below, the compressor of the bass microphone is side chained to the Kick which glues them together. Only use 5-6 dbs of audio reduction for this or you’ll get “pumping and breathing” artifacts.
6. Getting the bass in shape: This is a matter of getting the right blend between a DI and microphone so that the sound is what the bass player uses on stage. It also means taking the time to divide the “low end space” of the mix correctly between the kick drum and the bass. Different groups have different sounds in this regard. Some groups have bassists that use bass guitars and amps that grab the territory between 70 and 150 hz. Others have bassists that use lots of “sub-bass” and like their sound to control the space from 60 hz down. This means that the kick will be equalized for the higher sonic territory.
7. Setting up drum busses (see buss photo above). I usually set up a “parallel compression” drum buss which is slammed with compression. As needed, I will send small amounts of the snare and kick through this buss to add punch. I then have a “drum reverb” buss, which will make use of a small amount of reverb, mostly for the snare. I also have a “full kit buss” for all but the kick, set up with compression and eq that helps the kit sit well in the mix. If I use multiple snare or kick mics, I will also run snare and kick busses.
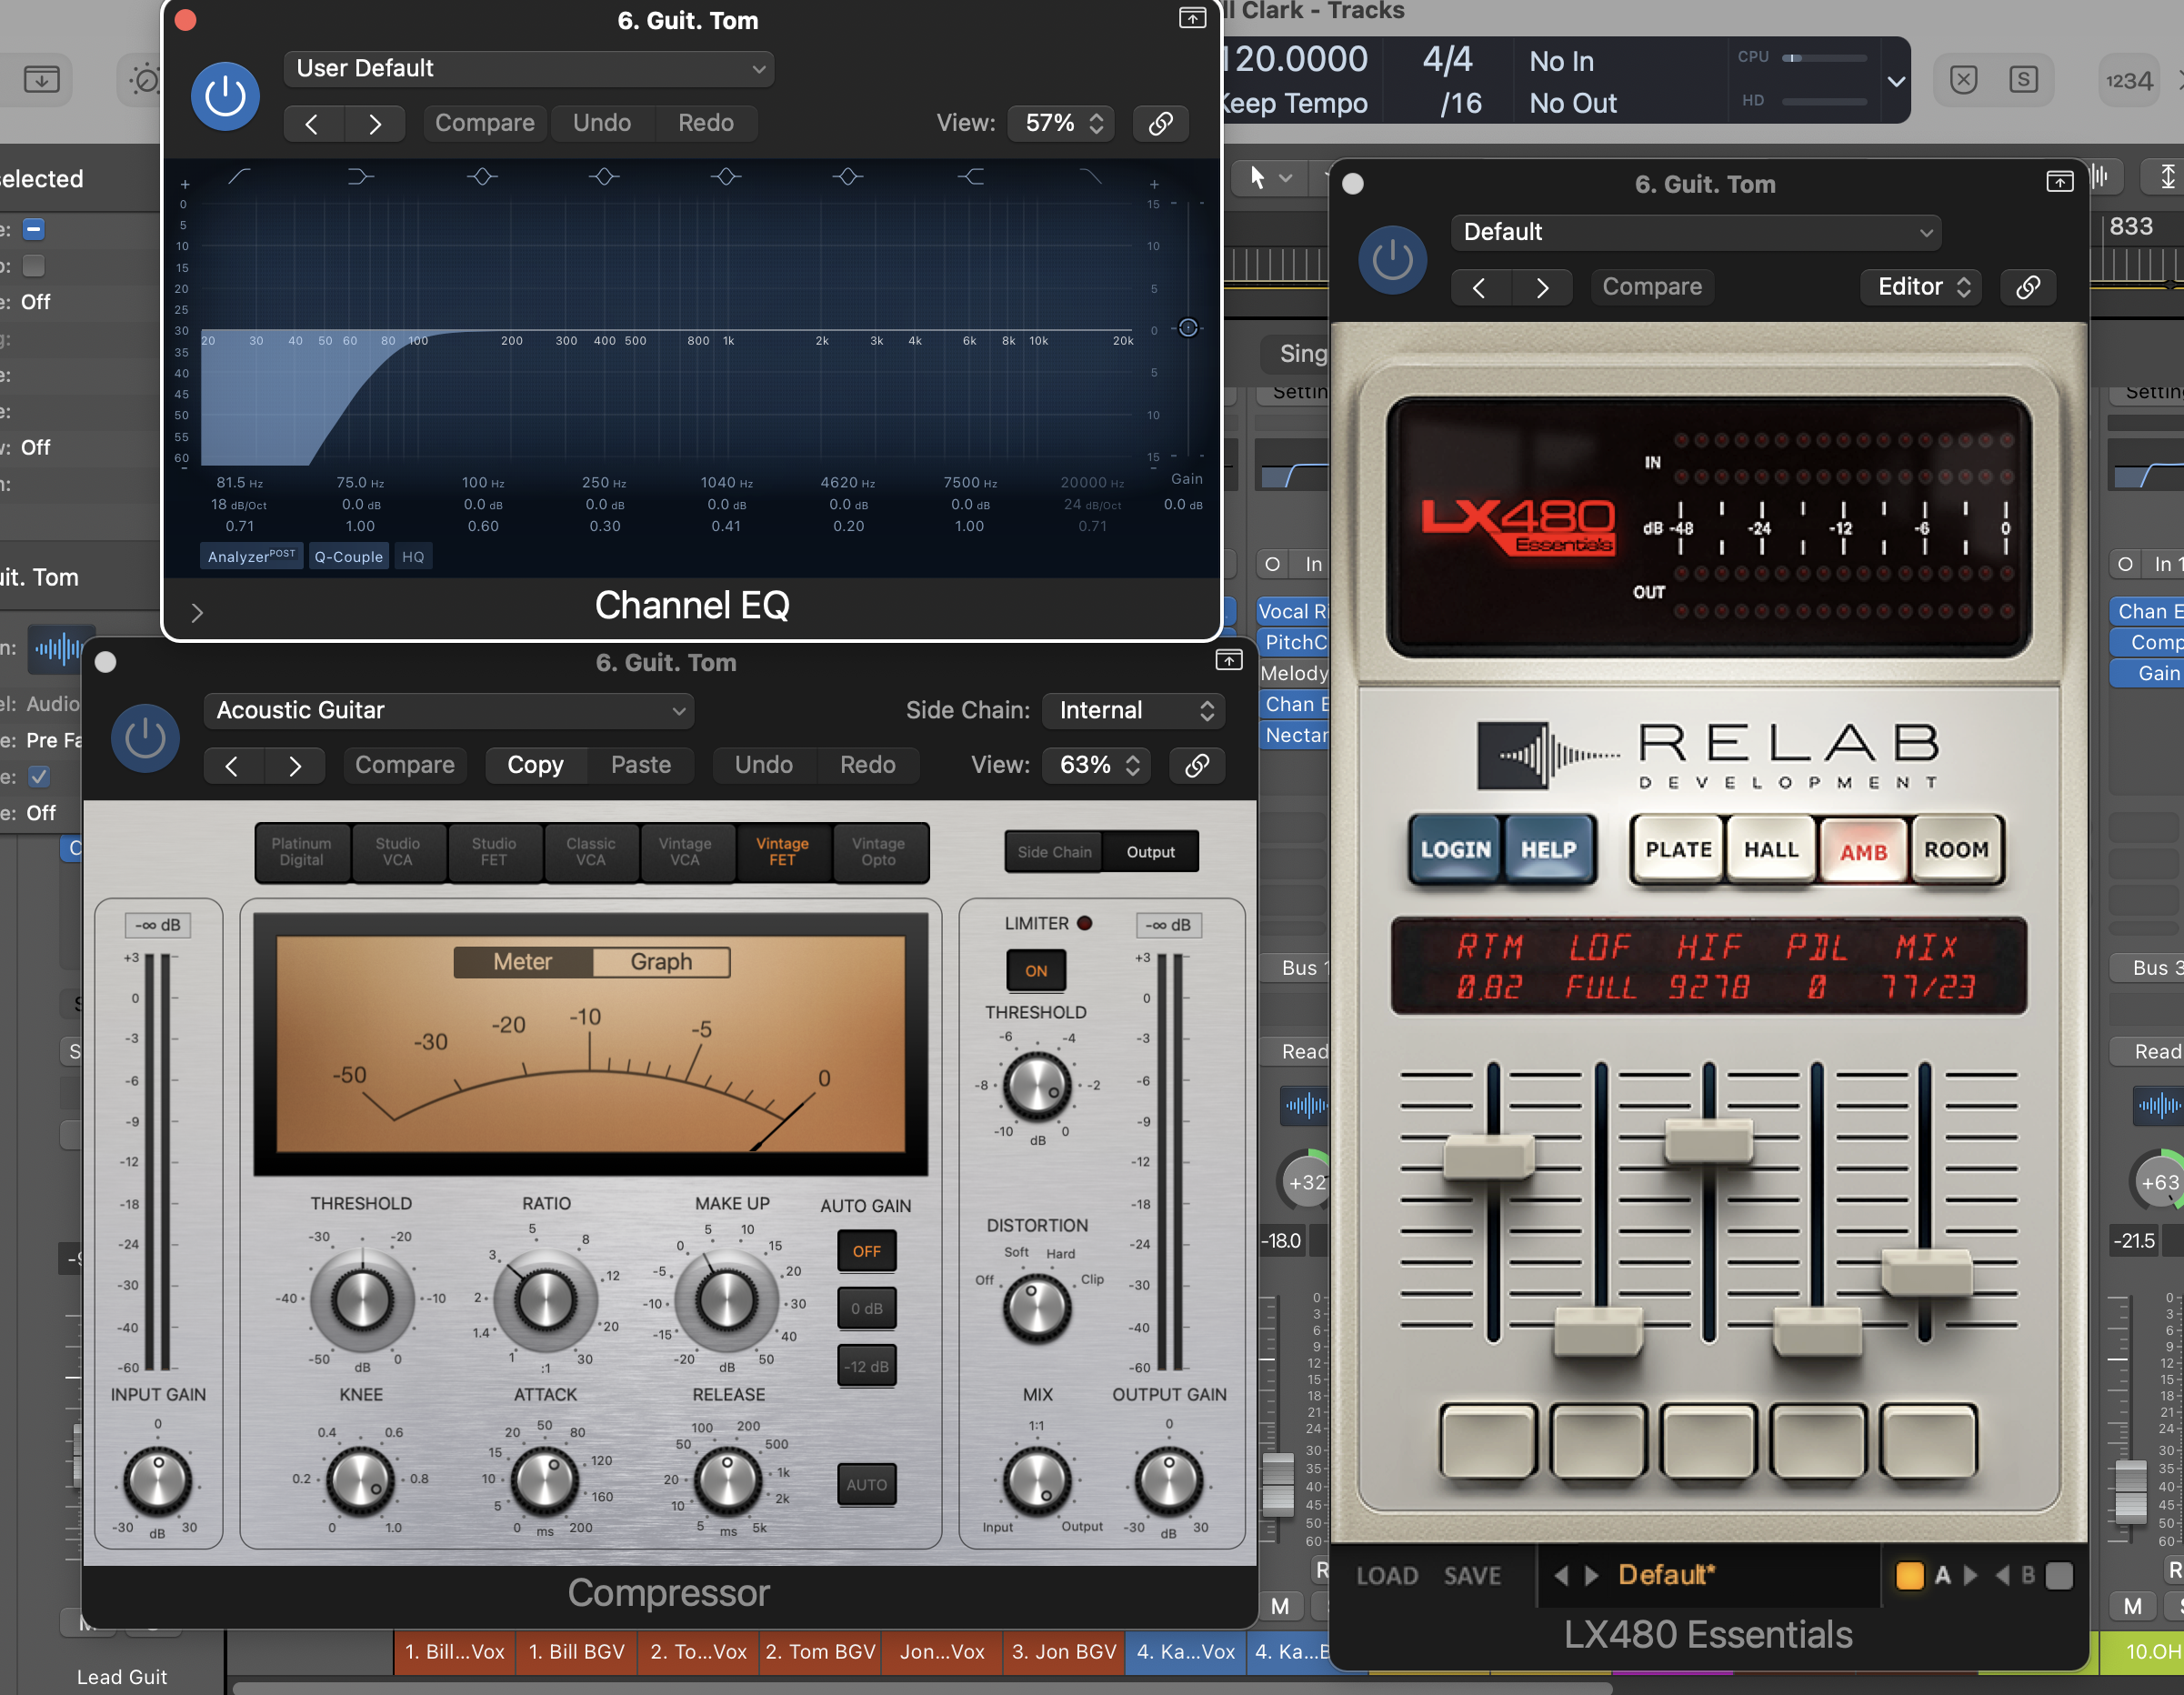
8. Getting the instruments in shape: This varies from instrument to instrument and player to player. For acoustic instrumentalists, this sometimes means rolling off some of the low end (to avoid the accumulation of “low end mud” in the mix). And it can also mean trying to find a clean sound that matches pretty closely what the audience hears, balancing direct boxes and microphones accordingly, and panning in a way that matches the onstage sound. For electric guitarists, the goal is once again to approximate as nearly as possible their onstage sound. For keyboardists, a stereo feed needs to be equalized and panned realistically to match onstage sound.
In the photo below, I’m rolling off the low end on Tom’s acoustic guitar, adding a little soft compression, and some gentle room ambience reverb.
9. Setting up instrument busses (see buss photo above): I usually have “lead guitar” and “rhythm guitar” busses set up, so I can make quick adjustments per song as needed. I’ll also have busses for electric guitars, keyboards, and other instruments, making sure that all instruments with more than one form of capture is mixed and easy to adjust in the mix.
10. Setting up the basic template for each song. Softer songs will require different mixes typically. When a guitarist changes instruments or volume level, decisions have to be made regarding how to bring the instrument up or down in the mix in a way that matches the player’s onstage intentions. Some automation might be required for an instrument when the player has been too erratic with a volume pedal onstage, etc. When multiple singers sing lead on different verses, their voices have to be cut and pasted onto lead or background tracks (see above). Many decisions are required for each song. It is NOT simply a matter of using the previous song’s mix.
In the photo below you can see the automation that was required on Tom’s acoustic guitar on a song where his volume pedal usage seemed to create a few volume issues.

11. Bouncing each song. Once the mix is done, each song must be bounced at a level that allows plenty of head room (at least 6 db) for mastering.
12. Mastering each song. Here you can set up a basic mastering template using eq, imaging, dynamic eq, compression, tape saturation, and a finalizer to bring the song up to appropriate volume for streaming or whatever final target is needed. This will need a little tweaking for each song depending on its volume and style. I usually wind up with an entire mastering “list” for each live performance in one template grid. I also usually add about 2 seconds of silence at the end of each song, making sure that it is faded nicely as well.
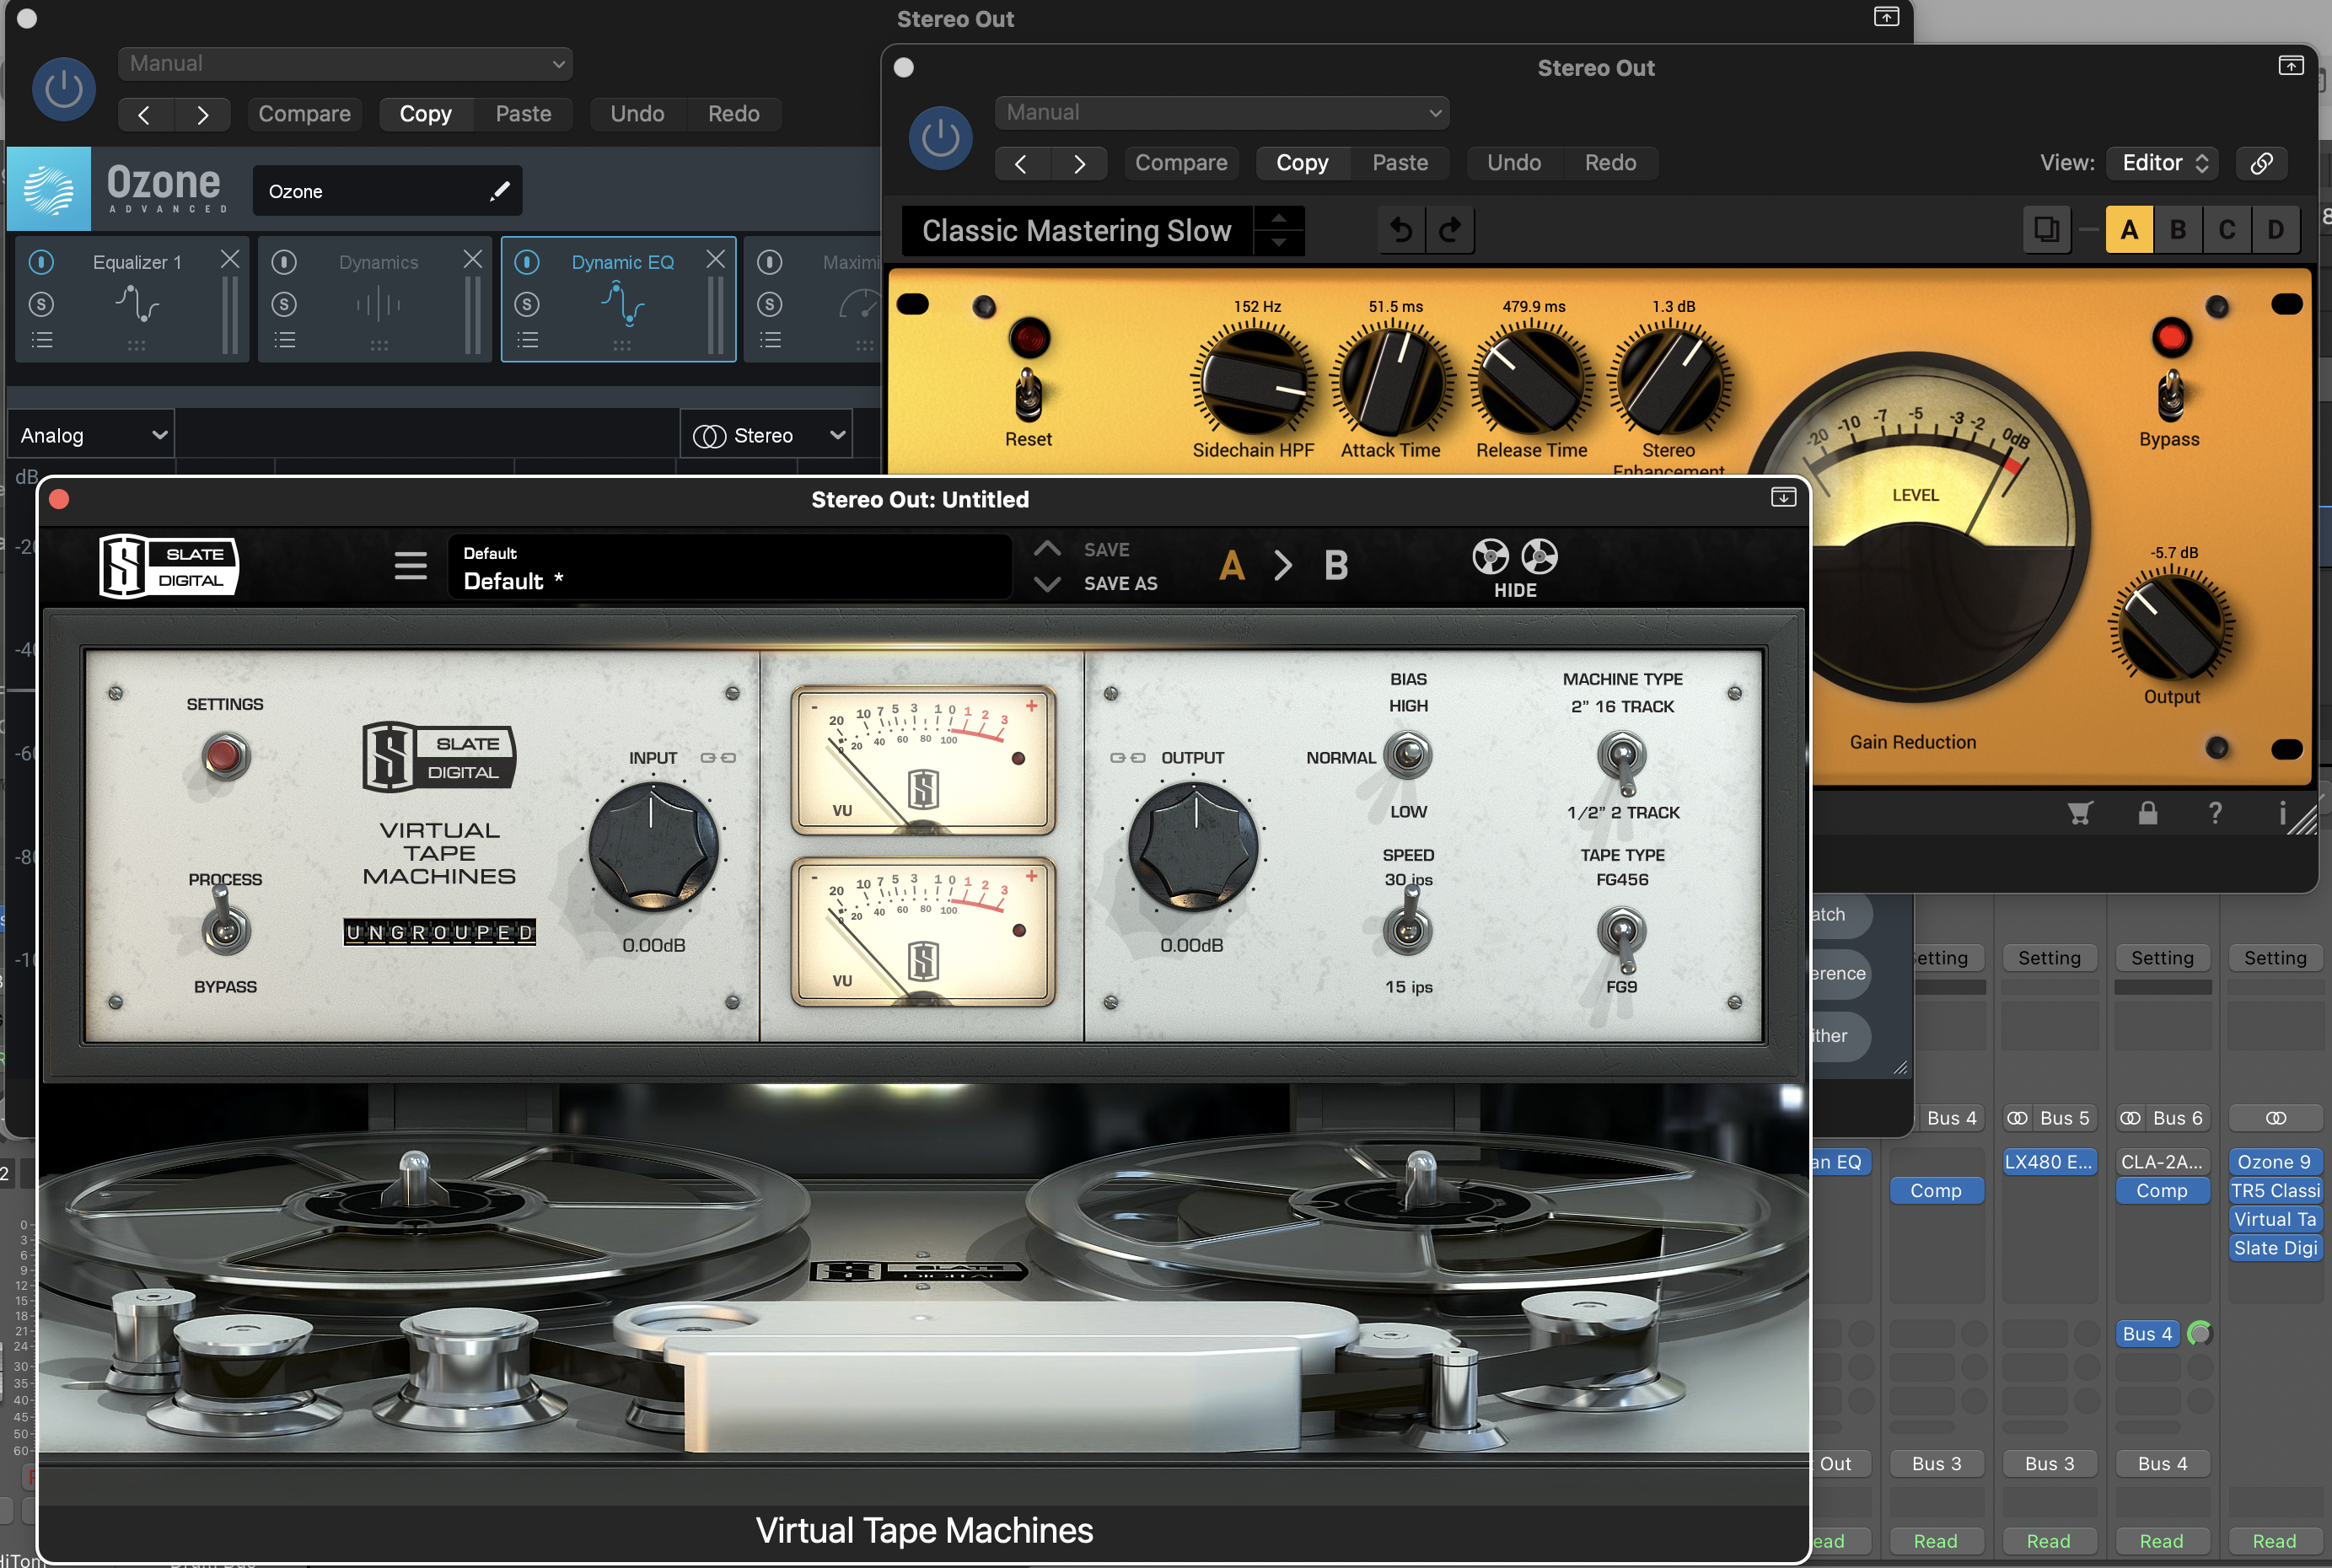
In the photo below you can see that I’m using a dynamic eq.(part of Izotope’s mastering suite), tape saturation plugin (from Slate), and a mastering compressor (from IK Multimedia).

Each song occupies a stereo track
in the mastering template.
ABOVE AND BEYOND THE CALL OF DUTY
What I don’t do (but could) when mixing a live performance. Some of these things I’m glad to do for a few choice songs that a band or artist might want to perfect. I assume that a roughly 30 song live gig might only have between 3-10 songs that an artist might want to “dig deeper” on for a CD, or some other presentation.
- Extensive pitch correction.
- Fixing the performance. This might mean repairing a lead, bass line, drum hit (errant kick for instance), vocal performance, etc. In some instances this can be accomplished by flying something into a performance from somewhere else (a kick hit or bass note, for instance). In other instances, however, the artist might have to come into the studio and redo a part. This is not always an option if microphone bleed issues are too overwhelming. Fixing a guitar lead, for instance, often can only be done for a few notes and not the entire lead. It’s also possible to make the background vocalists and lead singer enter and release together. This sometimes requires using Izotope RX Rebalance on the vocal tracks to remove most of the music bleeding into vocal mics prior to realignment to avoid adding delay or artifacts to the vocal tracks.
- Changing the mix. This might involve adding more reverb, adjusting volume or pan, and so on as per the artist’s taste.


